
How to Clean and Prepare Electric Car Alloy Wheels for GYEON Coating: A Complete Guide
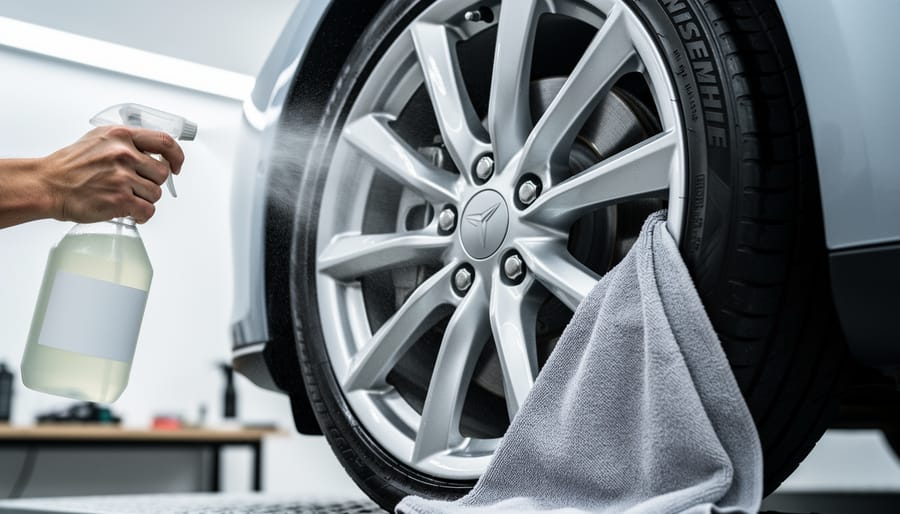
Properly cleaning electric vehicle alloy wheels before applying GYEON ceramic coating requires a three-phase process: decontamination with iron remover and clay bar, deep cleaning with pH-neutral wheel cleaner, and final preparation with isopropyl alcohol. The entire procedure takes approximately 90 minutes per vehicle and directly influences coating longevity, which typically extends to 24 months when preparation is executed correctly.
Electric vehicle owners face a unique challenge in wheel maintenance. Regenerative braking systems generate less traditional brake dust than combustion vehicles, yet road contaminants, tar, and industrial fallout still bond to alloy surfaces. GYEON coatings, including Q² Rim and Q² RimCoat, demand surgically clean surfaces to achieve proper molecular bonding. Any residual contamination creates barrier layers that compromise coating adhesion and hydrophobic performance.
The EV maintenance impact extends beyond cosmetic concerns. Alloy wheels represent a significant embodiment energy investment in vehicle manufacturing. Ceramic coating protection extends service life, reduces replacement frequency, and minimizes the environmental footprint of ownership. Industry data from 2026 indicates that properly maintained coated wheels can defer replacement by 40 to 60 percent compared to unprotected surfaces exposed to road salt and chemical cleaners.
This guide provides the exact sequence, chemical selections, and verification methods required for professional-grade results. Each step addresses specific contaminant types while preserving the alloy substrate integrity necessary for GYEON coating systems.
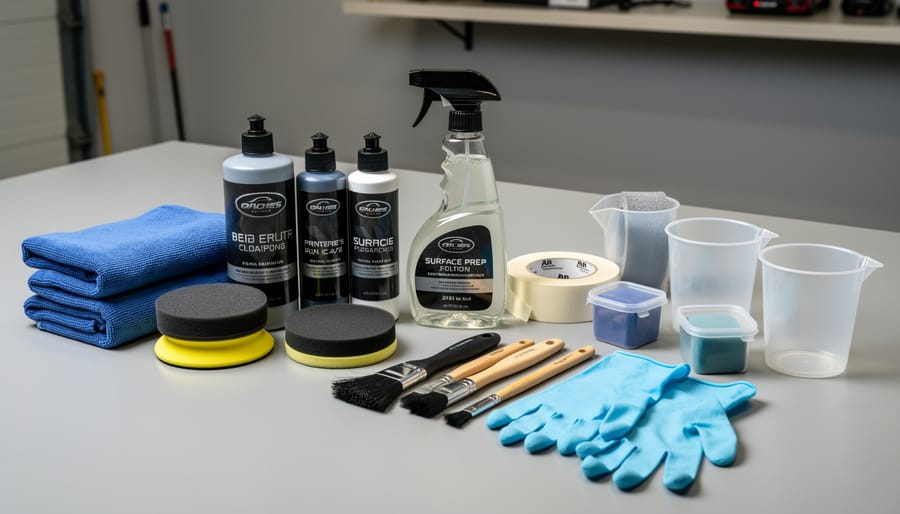
Essential Tools and Materials for Wheel Preparation
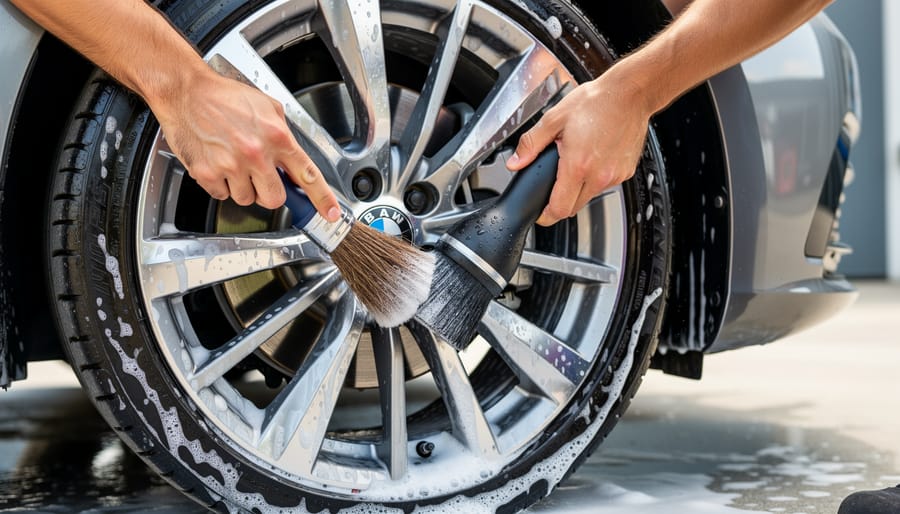
Proper wheel preparation requires specific tools and materials to achieve the contamination-free surface necessary for successful ceramic protection for alloy wheels. Using the correct products ensures thorough cleaning without damaging the alloy finish or leaving residues that compromise coating adhesion.
pH-neutral wheel cleaner designed for alloy wheels that won’t strip existing protection or etch the metal
Dedicated iron remover or fallout remover that chemically dissolves embedded brake dust particles
Clay bar or clay mitt with appropriate lubricant for mechanical decontamination
Isopropyl alcohol (IPA) at 70% concentration or higher for final surface preparation
Wheel woolies or spoke brushes in multiple sizes to access barrel areas and tight spoke gaps
Soft-bristle detailing brushes for lug nut recesses and intricate wheel designs
Premium microfiber towels designated specifically for wheels, never used on painted surfaces
Two buckets for the two-bucket wash method to prevent contamination cross-transfer
Grit guards for both wash and rinse buckets to trap particles at the bottom
Pressure washer or strong hose with adjustable nozzle for initial and final rinsing
Chemical-resistant gloves to protect hands from cleaners and iron removers
Wheel stand or jack stands if removing wheels for thorough barrel access
Quality matters significantly when selecting these materials. Cheap microfiber towels shed fibers that embed in coating, while harsh brushes scratch alloy surfaces. Iron removers vary in strength, with professional-grade products working faster and more thoroughly than consumer versions. The clay bar should be medium grade, too aggressive for painted surfaces but effective for wheel contamination.
Keep separate tools exclusively for wheel work. Brake dust contains metallic particles that scratch paint if transferred via shared towels or buckets. This dedicated approach prevents cross-contamination and maintains the integrity of both your wheel preparation process and vehicle detailing routine.
Critical Safety Warnings and Precautions
Working with wheel cleaning chemicals and electric vehicle components requires careful attention to protect both yourself and your vehicle’s sensitive systems. Before beginning any preparation work, park the vehicle on a level surface, engage the parking brake, and place wheel chocks behind the rear wheels to prevent any movement during the cleaning process.
Chemical wheel cleaners and iron removers contain strong acids or alkaline compounds that can cause skin burns and respiratory irritation. Always wear chemical-resistant gloves rated for automotive chemicals, safety glasses or a face shield, and work in a well-ventilated area or outdoors. If working in a garage, open doors and windows or use fans to maintain airflow, as fumes from iron removers and isopropyl alcohol can accumulate quickly in enclosed spaces.
Electric vehicles have sensors embedded in wheel wells and around brake assemblies that monitor everything from wheel speed to brake pad wear. These sensors are more vulnerable to chemical damage than traditional mechanical components. Avoid direct contact between cleaning products and any visible wiring, connectors, or sensor housings. If you must work near these components, cover them with plastic wrap or masking tape before applying chemicals.
When handling alloy wheels that have been removed from the vehicle, use proper lifting techniques to avoid back strain, wheels typically weigh fifteen to thirty pounds. Place removed wheels on padded surfaces or wheel cradles to prevent scratching the finish you’re about to protect with coating.
Step-by-Step Wheel Cleaning and Preparation Process
Initial Rinse and Heavy Contamination Removal
Start with a thorough rinse using a pressure washer set to 1200-1500 PSI, directing the spray from top to bottom to flush loose dirt, road salt, and surface grime from the wheel face and barrel. Hold the nozzle 12-18 inches away to avoid forcing water into wheel bearings or brake components. Pay particular attention to spoke intersections and the area behind the spokes where debris accumulates.
After the initial rinse, spray a pH-neutral wheel cleaner liberally across all wheel surfaces, ensuring complete coverage of the barrel, spokes, and face. Let it dwell for 3-5 minutes, check the product label for exact timing, to break down surface contamination without attacking the alloy finish. pH-neutral formulations are essential because acidic or alkaline cleaners can etch aluminum alloy and compromise coating adhesion.
While the wheel cleaner works, prepare your iron remover. Electric vehicles generate fine metallic brake dust through regenerative braking, and this contamination bonds chemically to the wheel surface. Apply iron remover immediately after rinsing off the wheel cleaner. You’ll see the solution turn purple or red as it reacts with embedded iron particles, this color change confirms the product is dissolving contamination you can’t remove mechanically.
Allow 5-7 minutes of dwell time for the iron remover, then agitate gently with a soft wheel brush to help release stubborn particles. Rinse thoroughly with your pressure washer, ensuring no chemical residue remains before moving to deep cleaning.
Deep Cleaning Wheel Barrels and Spokes
Once you have removed the initial layer of contamination, the wheel barrels and spoke interiors require targeted attention. These areas trap brake dust, road grime, and fine particles that standard washing misses, creating a barrier between the alloy surface and your GYEON coating.
Start with the wheel barrel using a long, flexible barrel brush that can reach the back surfaces. Apply a small amount of pH-neutral wheel cleaner directly to the brush, then work in circular motions from the outer edge toward the hub. The brush bristles should make contact with all barrel surfaces, including the areas behind the spokes where contamination accumulates heavily on electric vehicles due to regenerative braking heat cycles.
For spoke interiors and tight angles, switch to a smaller detailing brush with soft bristles. Work the brush into each spoke crevice, paying attention to areas where spokes meet the rim and barrel. Lug nut recesses collect stubborn deposits that affect coating adhesion, so use a dedicated lug nut brush or wrapped microfiber around a smaller tool to clean these pockets thoroughly.
Rinse each section immediately after brushing to prevent cleaner from drying. Inspect your progress with a flashlight, checking for any remaining contamination in shadowed areas before proceeding to the next wheel.
Decontamination and Surface Smoothing
Even after thorough washing, your alloy wheels likely harbour bonded contaminants, microscopic metal particles, tree sap, tar spots, and industrial fallout, that chemical cleaners cannot dissolve. These create a rough surface texture that compromises coating adhesion.
Clay bar or clay mitt decontamination physically lifts these particles without scratching the alloy. Choose a fine-grade clay specifically designed for wheels; medium or aggressive grades risk marring softer alloy finishes common on electric vehicles.
Spray a generous amount of clay lubricant directly onto a small wheel section, approximately 12×12 inches. Never use water as a substitute, proper lubricant creates the slippery barrier that prevents scratching. Work the clay across the surface using light, overlapping strokes in straight lines rather than circles. You’ll feel resistance initially as the clay catches contaminants; this smooths out as the section becomes clean.
Fold and knead the clay frequently to expose a fresh surface. If you drop the clay, discard it immediately, any grit picked up from the ground will scratch your wheels.
The surface should feel glass-smooth when you run your bare hand across it. Any remaining texture indicates bonded contamination that will prevent proper coating adhesion and must be addressed before proceeding.
Final Cleaning and Surface Preparation
After decontamination, perform a final rinse with clean water to flush away all clay lubricant and loosened particles. Use a fresh microfiber wash mitt with pH-neutral shampoo to gently wash the entire wheel surface one last time, ensuring no residue remains from previous cleaning stages.
Rinse thoroughly with distilled or deionized water if available. Hard water minerals can interfere with coating bonding, so a final distilled water rinse eliminates this risk entirely. If using tap water, proceed immediately to drying to minimize mineral deposits.
Dry wheels completely using clean, lint-free microfiber drying towels dedicated exclusively to wheel work. Pat rather than wipe to avoid reintroducing contamination. Pay special attention to spoke recesses, lug nut areas, and the barrel edge where water pools. Compressed air works exceptionally well for blowing water from tight crevices that towels cannot reach.
Once visually dry, saturate a fresh microfiber applicator pad with 70% or higher isopropyl alcohol (IPA). Wipe down the entire wheel surface methodically, working in overlapping passes. The IPA removes any remaining oils, waxes, or fingerprints that would prevent coating adhesion. Allow 30 seconds for the alcohol to evaporate completely before proceeding to surface inspection. The wheel should feel completely clean and slightly grippy to the touch, not slick.
Pre-Application Surface Inspection
After completing all cleaning and preparation steps, a thorough inspection ensures your wheels meet the exacting standards required for GYEON coating adhesion. This final check catches any issues before coating application, when corrections are still simple.
Begin with proper lighting, work in bright, direct light or use a handheld LED torch at various angles across the wheel surface. Shadows reveal contaminants, residue, or surface imperfections that overhead lighting misses. Slowly rotate the wheel, examining every spoke, the rim edge, and barrel areas you can access.
Perform the glove test: wearing a clean nitrile glove, lightly run your fingertips across all wheel surfaces. A properly prepared wheel feels glass-smooth. Any roughness, grittiness, or raised spots indicate remaining contamination requiring additional clay bar treatment. Pay particular attention to areas around lug holes and spoke valleys where contaminants hide.
Check for water spots from improper drying, these appear as white rings or cloudy patches. If present, rewipe affected areas with isopropyl alcohol on a fresh microfiber cloth.
Inspect for scratches or chips in the alloy. Minor imperfections will not prevent coating but should be noted, as GYEON products will not fill or repair these defects.
Verification and Readiness Check Before Coating
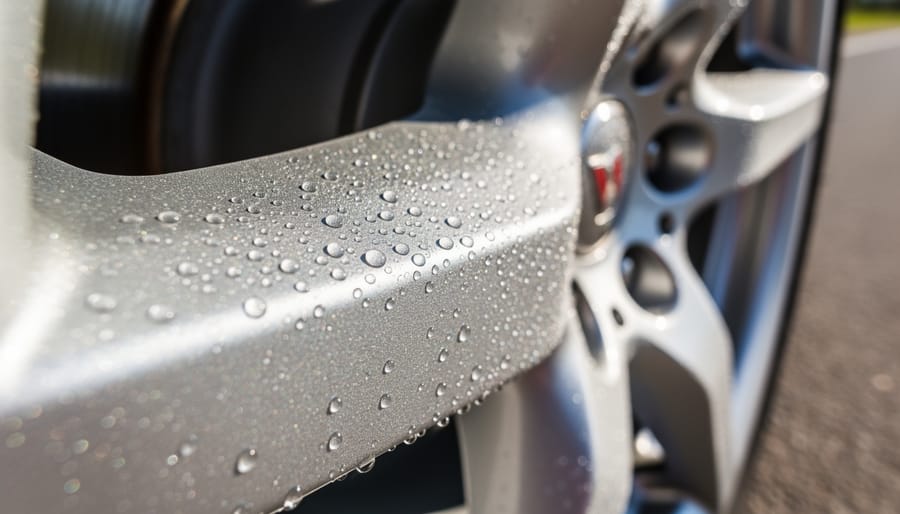
Before applying your GYEON coating, run through these verification checks to confirm your wheels are ready. A properly prepared surface determines whether your coating lasts months or years, so taking five minutes now prevents disappointment later.
Start with the water beading test. Spray clean water across the wheel face and observe how it behaves. Water should sheet off smoothly in a uniform film rather than beading into droplets. If you see tight beads forming, oils or wax residue remain on the surface, wipe down again with fresh isopropyl alcohol on a clean microfiber towel. The water sheeting pattern tells you the surface is chemically clean and ready for bonding.
Next, perform a surface touch inspection. Run your fingertips lightly across the wheel face, barrel, and spoke edges. The surface should feel completely smooth, like glass. Any rough patches, bumps, or texture indicate bonded contaminants that survived the clay bar treatment. Re-clay those specific areas until they pass the touch test.
Conduct a thorough visual contamination check under bright LED or sunlight. Hold a work light at various angles to the wheel surface, examining for any remaining tar specks, iron deposits (rust-colored spots), or industrial fallout. Your eyes catch what your fingers might miss. Even tiny contamination points create weak spots where coating fails first.
Consider temperature considerations and environmental timing. Wheels should be cool to the touch, never apply coating to warm or hot wheels. Ambient temperature matters too: GYEON coatings cure best between 15-25°C. Plan to apply coating within two to three hours of completing preparation. Longer delays allow airborne contaminants to settle back onto the clean surface, compromising adhesion. If you must wait, store wheels in a clean, dust-free area and perform a final isopropyl alcohol wipe immediately before coating.
Common Preparation Mistakes and How to Avoid Them
The most frequent mistake is rushing through decontamination, leaving embedded brake dust particles that prevent the GYEON coating from bonding properly to the alloy surface. Many owners underestimate the contamination buildup on electric vehicle wheels, particularly around regenerative braking zones, and skip the clay bar stage entirely. This leaves microscopic contaminants that create failure points for the coating. Always complete the full decontamination process, even if the wheel looks clean, run your hand across the surface to feel for rough spots that indicate remaining contamination.
Improper drying creates another common problem. Using dirty towels or allowing wheels to air-dry leaves water spots and mineral deposits that compromise coating adhesion. These deposits act as barriers between the coating and the wheel surface, leading to premature failure and uneven protection. Use dedicated, clean microfiber towels for drying, and work in sections to prevent water from re-depositing on cleaned areas.
Touching cleaned wheels with bare hands introduces oils that prevent proper coating adhesion. This seems minor but creates invisible contamination that significantly reduces coating performance. Wear nitrile gloves during the final preparation stages, especially after the isopropyl alcohol wipe-down. The same caution applies to anyone helping with the preparation, skin oils transfer instantly and require re-cleaning the affected areas.
Working in direct sunlight or on hot wheels causes cleaning products to dry too quickly, leaving residue that interferes with coating bonding. Choose early morning or late afternoon hours for preparation work, keeping wheels cool to the touch. This attention to detail helps future-proof EVs by ensuring their protective coatings perform as intended throughout their service life.
Frequently Asked Questions
How long does the entire wheel preparation process take?
Plan for 60 to 90 minutes for a thorough four-wheel preparation, though the first attempt may take longer. Working methodically through each stage matters more than rushing, since incomplete preparation compromises coating adhesion and durability.
Can I use regular car wash soap instead of pH-neutral wheel cleaner?
Standard car wash soap lacks the chemical strength to break down embedded brake dust and iron particles that accumulate on EV wheels. A pH-neutral wheel cleaner is specifically formulated to dissolve these contaminants without damaging the alloy surface or leaving residue that interferes with coating bonding.
What’s the ideal temperature range for wheel preparation?
Work in temperatures between 10°C and 25°C (50°F to 77°F) with wheels cool to the touch. Extreme heat causes cleaners to dry too quickly, while cold temperatures slow chemical reactions and make products less effective.
How soon after preparation should I apply the GYEON coating?
Apply the coating within 2 to 4 hours of completing the final isopropyl alcohol wipe-down. Beyond this window, environmental contaminants and oils can settle on the surface, requiring you to repeat the final preparation steps for optimal adhesion and longer-lasting protection.
These preparation steps demand attention to detail, but the payoff comes in coating performance that can last years rather than months. Electric vehicle owners who invest the time in proper wheel preparation consistently report better hydrophobic properties, easier cleaning between maintenance sessions, and protection that withstands the unique demands of regenerative braking systems. The key is treating preparation as part of the coating process itself, not a preliminary step you can shortcut.